A Little bit of History…
I came across these gems from my early career while sorting out some old filing boxes.
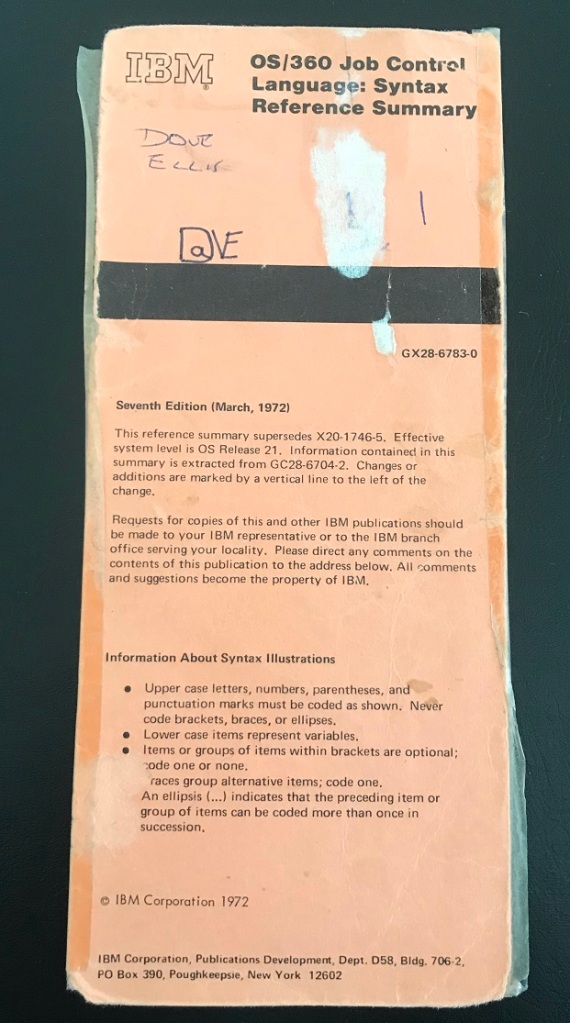
S/360 JCL Reference, circa 1972.
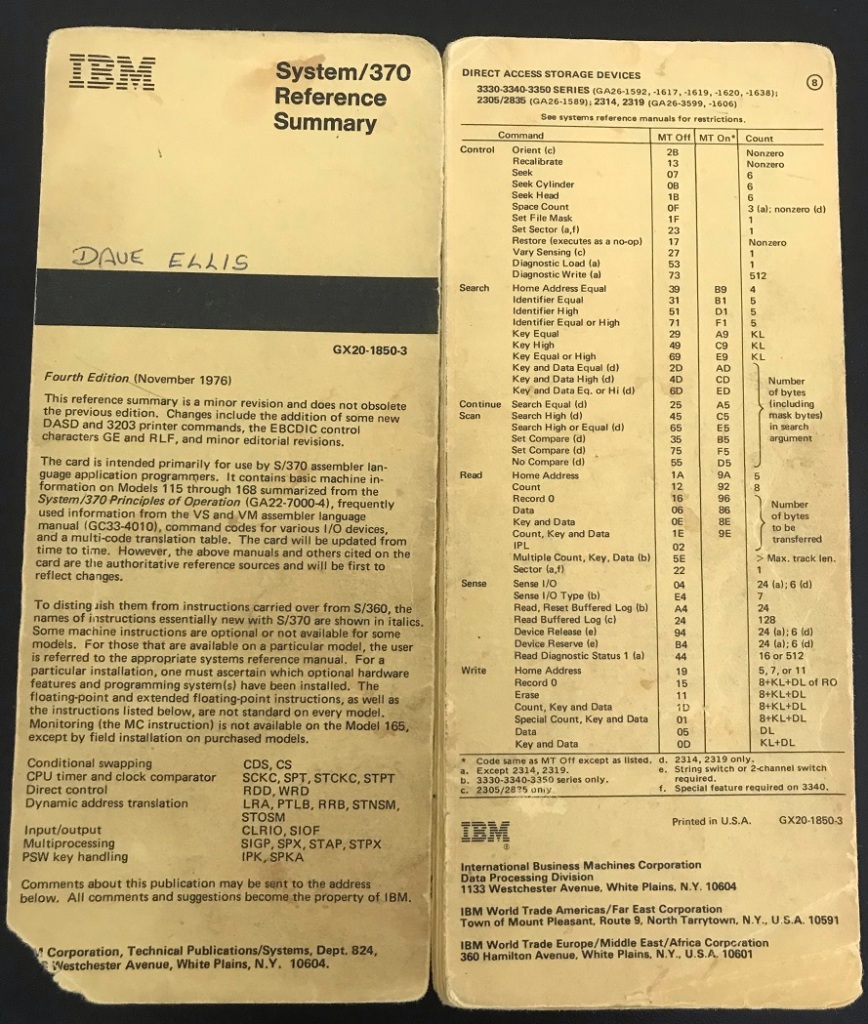
S/370 Reference Summary, circa 1976
Running a control block chain…
Disclaimer. I didn’t invent this. I saw the general technique many years ago in some code I was working on and I have always thought it was pretty neat, so it’s time to pass it on to the probably few people left in the world that have not seen it.
Lets assume you have a control block structure like this:
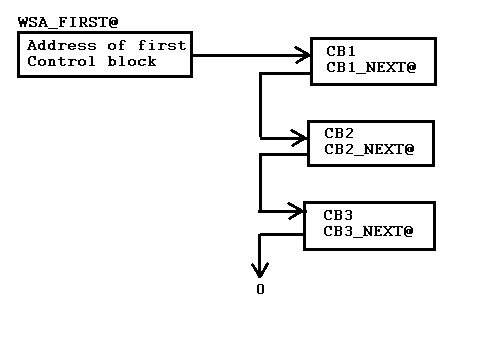
WSA_FIRST@ is a full word pointer somewhere in storage (working storage for example), addressed by some register so we have a using on it can can address it by label. It points to the first control block in the structure, or contains zero if there are none on the chain.
The control blocks are mapped by this DSECT:
CB       DSECT
CB_LENGTH DS F        Control block length
CB_NEXT@ DS A         Address of next cb or zero if last
         :            Other fields as required
Assuming I am using register R08 to address the control blocks, this is how I would typically run this chain:
         USING  CB,R08
         LA    R08,WSA_FIRST@-(CB_NEXT@-CB)
LOOP     DS    0H
         ICM   R08,15,CB_NEXT@   First, next or zero if end
         JZ    LOOPEND
         :                       Code here to process the control block
         J     LOOP
LOOPEND  DS    0H
         DROP  R08                Drop CB using
The LA (Load Address) sets the control block base register, R08, to point to some point BEFORE the address of the WSA_FIRST@ field. The resultant address does not even have to be addressable by the code because the instruction is just calculating an address of some storage location, not actually referencing it. So, NO S0C4!
In this example R08 would end up pointing to an address 4 bytes BEFORE the location of WSA_FIRST@ because the CB_NEXT@ field is at offset 4 in the control block (CB_NEXT@-CB) and we subtract that from the address of WSA_FIRST@.
So now comes the clever part.
The assembler thinks the control block (CB DSECT) is addressed by R08, and it thinks the CB_NEXT@ field is at offset +4 in the CB DSECT so the label (CB_NEXT@) in the ICM (Insert Characters under Mask) instruction resolves to R08 plus 4. So the ICM gets the 4 bytes from where R08 is pointing (remember, it is pointing to 4 bytes BEFORE the actual first control block address field in storage somewhere) plus 4, which means on the first time through the loop it loads R08 with the data from WSA_FIRST@.
So now, R08 is either zero, if there are no control blocks on the chain, or it addresses the first control block (CB1).
If it is zero, the JZ (Jump if Zero) instruction causes us to exit the loop, otherwise we drop through to process the control block before jumping back to the start of the loop.
This time, R08 is pointing at CB1 so the ICM instruction loads R08 from the CB_NEXT@ address field in CB1 so now R08 is pointing at CB2.
Again we process the control block before jumping to the top of the loop.
This time, R08 is pointing at CB2 so the ICM instruction loads R08 from the CB_NEXT@ address field in CB2 so now R08 is pointing at CB3.
Again we process the control block before jumping to the top of the loop.
This time, R08 is pointing at CB3 so the ICM instruction loads R08 from the CB_NEXT@ address field in CB3. Since CB3 is the last control block on the chain its CB_NEXT@ field is zero so the JZ instruction is true and we exit the loop.
Using the IBM Assembler Toolkit Macros
The following is functionally equivalent, and in my opinion, a lot cleaner and easier to read (you also don’t have to worry about label names just to implement logic):
         USING  CB,R08
         LA    R08,WSA_FIRST@-(CB_NEXT@-CB)
         DO    WHILE=(ICM,R08,15,CB_NEXT@,NZ)
             :                      Process the control block here
         ENDDO
         DROP  R08
There is however one slight difference in how the code assembles between the DO/ENDDO version and the hard coded version I showed initially.
Even though the ICM instruction and it’s operands are coded on the WHILE operand of the DO macro, the actual instruction is generated at the END of the loop by the ENDDO macro. In addition it generates a JNZ (Jump if Not Zero) instruction to return to top of the loop, versus the JZ (Jump if Zero) instruction in my hard coded loop.
However the biggest impact of this is that you must have addressability to the control block when the ENDDO macro is invoked. So something like this will not assemble:
         USING  CB,R08
         LA    R08,WSA_FIRST@-(CB_NEXT@-CB)
         DO    WHILE=(ICM,R08,15,CB_NEXT@,NZ)
             : Process the control block here
             DROP R08
         ENDDO
When the ENDDO generates the ICM instruction, the assembler no longer has addressability to the CB DSECT addressed by R08 so the assembly fails.
Running a chain backwards
The same general technique works when running a chain backwards, that is from the last entry to the first.
Obviously the anchor point field in storage has to point to the LAST control block on the chain and each control block has to have a back pointer to the control block BEFORE it (CB_PREV@ maybe) on the chain.

Linux, Windows and related fun…
So let me make this clear. I am NO Linux expert, in fact I barely touch it. I have a web server running an old version of SuseLinux under my desk that I NEVER touch. The web site is just static pages, easily updated simply by replacing them and it works so why mess with something that is not broken!
That said, my wife recently ‘donated’ here old desktop PC to me as she was not using it any more. It’s a decent machine (DELL) but running Windows 10 it was sooooo sloooooow it was painful to use. So I decided to put Linux on it as I had something that I wanted to run on it long term and the problem with Windows is that, in its wisdom it periodically just updates itself and reboots the PC.
So, I downloaded the latest OpenSuse iso, burnt a CD and installed it. Well, after about two days of fighting with it, I installed it!. Most of the installs were because I’d configure it, decide that was not what I wanted (Figuring out which desktop to use was the worst, settled on Gnome in the end but only after about four different attempts at the install) and so it was just easier to wipe it al out and start again.
So, now to the whole point of this post. My workspace is pretty large (it’s actually made from a kitchen counter top) but also pretty cluttered so having yet another screen, mouse and keyboard on there was not really an option.
My primary monitor had a spare VGA input so I used that but I still had to switch the display over and put the mouse/keyboard on my desk while I used the Linux box and picking up the wrong mouse or typing on the wrong keyboard soon got annoying.
So I looked into remote access.
At first I looked at using X11 but after a lot of messing and experimenting I decided it was messy to set up, still needed a lot of knowledge to use and really only brought individual apps over to the Windows desktop, not the whole Gnome desktop. I am no power user so I need all the help I can get and configurig individual Linux apps to run via X11 on my Windows desktop just seemed like a lot of extra work!
So I opted for VNC which gives you the full desktop experience.
Now you’d think that this would be easy and like all things, once you know how, it is but getting to that stage still took a couple of days! So this is the output from that ‘learning’ experience.
I am running Windows 10 and OpenSuse Leap 15.1 so this information should work for that configuration but like all software, as it moves forward (for better or worse!) who knows how long it will stay valid. Still…
One Time Setup Stuff
So first off, on the Linux box, using Yast, in in Network Services Remote Administration (VNC) , I set:
Allow Remote Administration with Session Management
The alternative was:
Allow Remote Administration without Session Management
I have no idea how that changes things, except perhaps in relation to sessions staying active when I disconnect the remote VNC session.
So then I used Putty on the Windows box to connect to my Linux box, LINBOX:
I set:
Hostname LINBOX Port 22
Under Connection:SSH:Tunnels add
Source port 5901
Destination LBOX:5901
I then saved that as a profile for future use.
I needed to do this next bit because up to this point, I could connect with VNC to my Linux desktop but all I got was a black screen. So for this next bit of the setup I needed to edit a file on the Linux box as a root user but rather than login as root, apparently never a good idea, I logged in as myself then did the following:
sudo vncserver This will start session with ROOT authority (enter root password when prompted)
Note session number or use vncserver -list to list sessions numbers (should be only one at this stage!)
Back on Windows I launched my VNC viewer (Tightvnc in my case) using host:port (so it was LINBOX:2) in my case
You will connect as root so enter root password when/if prompted.
This put me into my Gnome desktop on the Linux box.
I then selected the files application from the application pull down on the desktop menu and navigated to:
/etc/gdm/custom.conf
I then right clicked on custom.conf and selected edit (so you are now editing this file as a root user).
Locate [xdmcp] and just below it add this line:
Enable=true
Then save the file, exit the files application and
logoff as root (top right corner of screen)
End vnc session (close the widow)
Now back in the putty command window, restart xdm by entering:
sudo systemctl restart xdm
Now kill that vncserver process (the one that was using root) with
vncserver -kill :n n was 2 in my case (see above)
And that’s it for the one time setup stuff.
Regular Logon
You should now be able to VNC as a regular user to your desktop (Gnome in my case) as a regular user as follows:
Start putty as before and select the same LINBOX config options
Hostname LINBOX Port 22
Under Connection:SSH:Tunnels add
Source port 5901
Destination P390:5901
Login with your user id and password
Issue:
vncserver This will start session as a normal user. NOTE NO SUDO command before vncserver.
Note session number or use vncserver -list to list sessions
Launch VNC Viewer or Tightvnc using host:port (so LINBOX:3 if the session number from vncserver was 3)
Enter YOUR password if required
And you should be good to go!!!
Also note that at this point you can close the putty window (type exit) and your VNC session will still work.
You can also just close the VNC window and come back to it later and it’s all still there, with apps open etc. No need to do the putty/vncserver steps, just use the same session number as before.
When you area ‘really’ done on your Linus desktop, open a putty window to your server as before and type:
vncserver -kill :n
Where n is the session number you were using. This will get rid of the background process.
I installed Regina Rexx and wrote a little exc to automate a lot of the regular logon stuff. It’s not perfect because it has hard coded passwords in it and currently only establishes a new session, cannot reuse an old one but it’s a start (and fun to figure out how to do anyway!)
I believe you can get around the hard coded password problem by setting up certificates to authenticate the session/user but that’s way beyond me at this point in time.
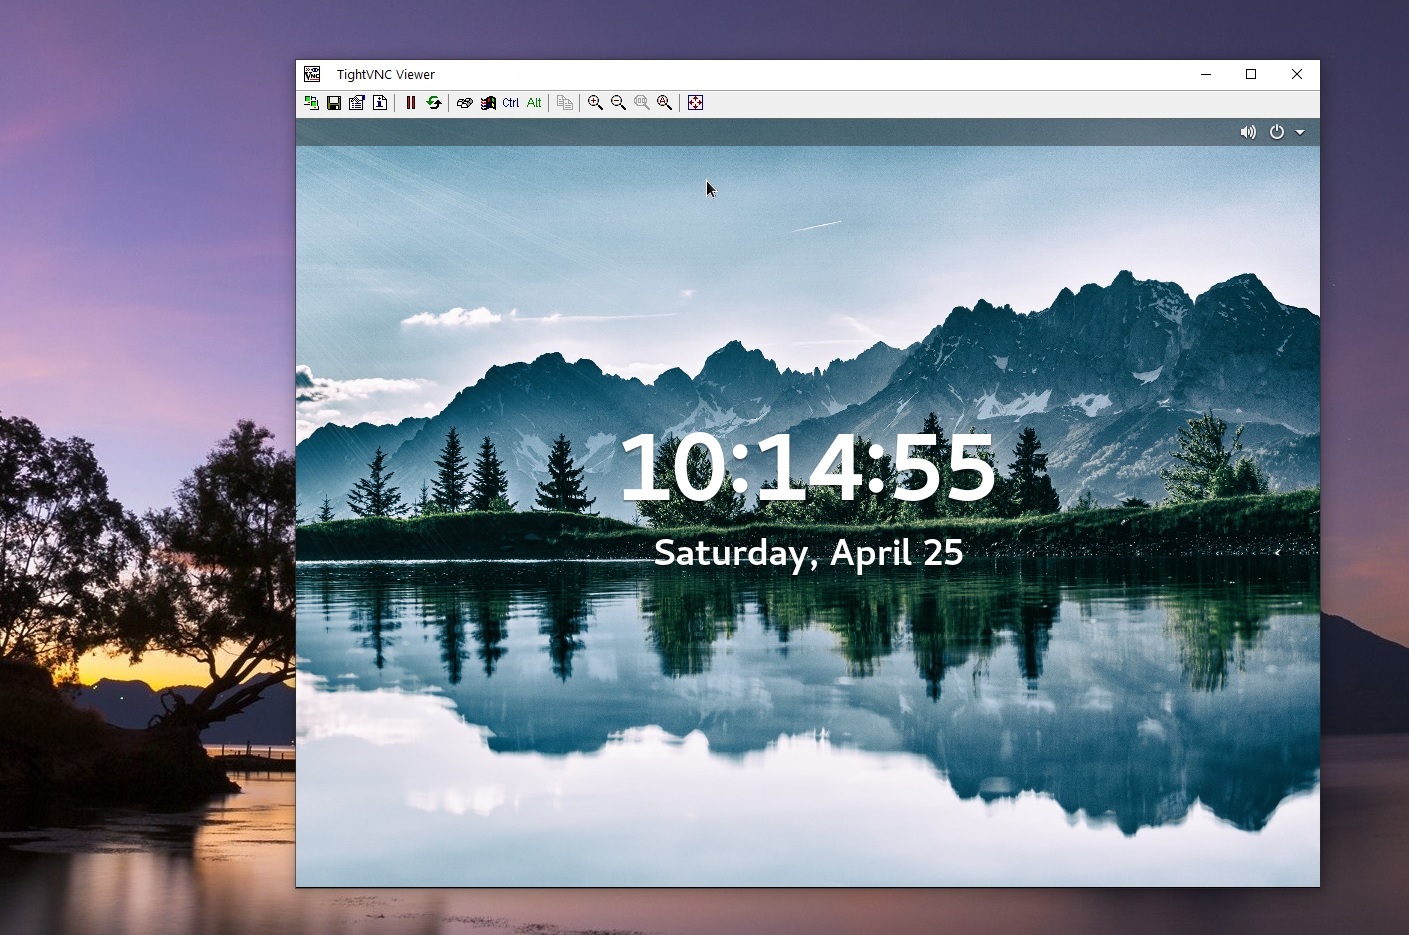
Here’s my (suspended) Linux Gnome desktop in a VNC window on my Windows desktop.
Backup a bit…
About a million years ago, actually 1976, I started in the computer industry as an operator. My job interview was with the managing director of the ‘computer department’ because it wasn’t ‘Information Technology’ yet! One thing that I have always remembered from that interview is him saying that I shouldn’t worry about making mistakes because it can always be fixed. I think he probably said it as much to reassure my novice self as anything else, but it always stuck with me.
And for the most part, he was right. But I have to qualify the general statement by saying that fixing it is a lot easier if you’ve got a backup of everything!
This comes to mind because a backup saved my bacon a few days ago.
I’ve been working on a little side project for a good while now, just a fun little thing I’ve been playing around with and while it’s not a lot of code as such, it is pretty involved. Now I still work quite a bit on a good old green screen in ISPF where I tend to use the 3.4 data set list option because I can easily switch from browse of a member to edit and back without having to switch ISPF screens.
The one thing I have never liked about the data set list function and the resultant member list display for a data set though, is that you can easily enter a D (for delete!) against either a data set or member. While it does prompt you to confirm the action (unless you’ve turned it off) it is pretty easy to be not paying attention, press enter on the confirm screen and it’s gone.
At this point you go ‘Oh F***k’ or words to that effect.
I know this because that’s exactly what happened to me the other day. Not paying attention, something popped up, I hit enter and it was only when the word ‘deleted’ appeared beside the member name that I realized I’d screwed up!
Now I’ve been working on this project for a while. In fact I last touched it a few years ago, got to a ‘sticky’ point where the coding was neither fun nor easy and put it aside until recently when I decided to pick it up again.
In all that time I kept thinking I really should start taking backups of the work. Fortunately for me, that’s exactly what I had done the previous day. I spent some time to write some jobs to back everything up so when I screwed up, thankfully I had a backup that I was able to restore the missing member from.
Had this happened a day earlier and it would have been a whole different story.
An after effect of this is that I wrote my own little data set list function that does NOT allow me to do a delete either against the data set or a data set member. Again, this was something I’ve often thought about, just never gotten around to until this happened and I got ‘motivated’ as it were.
My ISPF 3.4 alternative can be down loaded from ===> here. <===
Unzip the file and upload the exec and panel to your ISPF REXX and ISPPLIB panel library using a text transfer to convert back to EBCDIC. Edit the exec to specify the name of the panel library or remove the LIBDEFs for the panel library if it is already allocated to your ISPF ISPPLIB DD.
Then just run the exec, @34. It takes two parameters:
- A mask to specify the datasets to list, just like the real 3.4
- One or more exclude strings. Any data set name in the result list that matches one of these strings will not be show.
Line commands against data sets are:
- B or S – Browse
- E – Edit
- Z – Compress
Line commands against a member in a member list are:
- S – Whatever what entered against the data set, E or B.
- E – Edit
- B – Browse
- SUB – Submit the member
- = Repeat the previous command
It’s very basic. A lot of the error messages are just issued as say statements. If you use it, feel free to modify it to your needs.
This is the exec source:
/* rexx */
/* Custom ISPF 3.4 function */
/* pfx is dataset prefix to list */
/* excl is one or more exclude masks */
/* David E Ellis April 2020 */

parse arg pfx excl
if pfx = '' then pfx = sysvar(syspref)

address ISPEXEC

/* "CONTROL ERRORS RETURN"*/

"LIBDEF ISPPLIB DATASET ID('DAVE.ISPPLIB')"

"TBCREATE @34 NAMES(DSNAME DSTYPE) NOWRITE"
if rc <> 0 then do
say "TBCREATE RC="rc
signal exit
end

rc=Build_list(pfx)
if rc <> 0 then signal exit

do forever
'TBTOP @34'
'TBDISPL @34 PANEL(@34)' ,
'AUTOSEL(NO)' ,
'ROWID(ROW)'

if rc > 7 then leave

'TBQUERY @34 POSITION(row)'
if row = 0 then row=1

do ztdsels

if sel <> '' then do
upper sel
select
when sel='S' then do
rc=doit('B') /* default */
end
when sel='B' then do
rc=doit('B')
end
when sel='E' then do
rc=doit('E')
end
when sel='Z' then do
rc=compress(dsname,dstype)
end
otherwise do
zerrsm = 'Invalid option'
zerrlm = 'Invalid option for this line'
zerralrm = 'NO'
'SETMSG MSG(ISRZ002)'
end
sel=''
end

end /* if sel <> '' */

if ztdsels = 1 then iterate
'TBDISPL @34'

end /* do ztdsels */

end

/*----------------------------------------------------*/
exit:
"CONTROL ERRORS RETURN"
"TBEND @34"
"LIBDEF ISPPLIB"
return 0

/*----------------------------------------------------*/
Build_list:
parse arg pfx
myrc=0

"LMDINIT LISTID(DSID) LEVEL("pfx")"
if rc <> 0 then do
say "LMDINIT RC="rc
myrc=4
signal Build_list_exit
end

DSN = ''
do forever
"LMDLIST LISTID("dsid") OPTION(LIST) DATASET(DSN)" ,
"STATS(YES)"
if rc = 4 then do
say 'Nothing found for 'pfx
myrc=4
leave
end
else
if rc = 8 then leave /* end of list */
else
if rc <> 0 then do
say "LMDLIST RC="rc
myrc=4
leave
end

exclrc=0 /* RC=0 means do NOT exclude */
if excl<>'' then do
exclrc=CheckExcl(dsn,excl)
end
if exclrc=0 then do
dsname=dsn
dstype=zdldsntp
"TBADD @34"
end
end

Build_list_exit:
"LMDLIST LISTID("dsid") OPTION(FREE)"
"LMDFREE LISTID("dsid")"
return myrc

/*----------------------------------------------------*/
doit:
myrc=0
parse arg option

if strip(dstype) = "" then do /* unknow org, let ispf handle */
option" DATASET('"dsname"')"
signal doit_exit
end
else
myrc=mlist(option)

doit_exit:
return myrc

/*----------------------------------------------------*/
mlist:
myrc=0
parse arg mlistopt
/* mlistopt just controls default action if S entered for mbr */

"LMINIT DATAID(MLID) DATASET('"dsname"') ENQ(SHR)"
if rc<>0 then do
say "LMINIT Rc="rc
say ZERRLM
myrc=4
signal mlist_exit
end

"LMOPEN DATAID("mlid") OPTION(INPUT)"
if rc<>0 then do
say "LMOPEN Rc="rc
myrc=4
signal mlist_exit
end

mbr=""
do forever

prevcmd=""

"LMMDISP DATAID("mlid") OPTION (DISPLAY) COMMANDS(ANY)" ,
"TOP("mbr") FIELD(9)"
if rc=0 then nop
else
if rc=4 then do
say " Empty dataset"
leave
end
else
if rc=8 then leave
else do
say "LMMDISP DISPLAY RC="rc
say ZERRLM
leave
end

mbr=strip(zlmember)
rc=procmbr(mbr,zllcmd)

do forever
"LMMDISP DATAID("mlid") OPTION(GET)"
getrc=rc
if getrc=0 then nop
else
if getrc=8 then leave
else do
say "LMMDISP GET RC="getrc
say ZERRLM
leave
end
mbr=strip(zlmember)
rc=procmbr(mbr,zllcmd)
end

"LMMDISP DATAID("mlid") OPTION(FREE)"

end

mlist_exit:
"CONTROL ERRORS RETURN"
"LMCLOSE DATAID("mlid")"
"LMFREE DATAID("mlid")"
return myrc

/*----------------------------------------------------*/
procmbr: Procedure Expose mlistopt dsname prevcmd
myrc=0
parse arg mbr,cmd

if cmd = "S" then do
prevcmd=mlistopt
myrc=procmbr(mbr,mlistopt)
end
else
if cmd = "B" then do
prevcmd="B"
"BROWSE DATASET('"dsname"("mbr")')"
end
else
if cmd = "E" then do
prevcmd="E"
"EDIT DATASET('"dsname"("mbr")')"
end
else
if cmd = "SUB" then do
prevcmd="SUB"
address TSO "SUBMIT ('"dsname"("mbr")')"
end
else
if cmd = "=" then do
myrc=procmbr(mbr,prevcmd)
end
else do
prevcmd=cmd
say "Invalid command "cmd
end

return 0

/*----------------------------------------------------*/
CheckExcl: Procedure
/* If any of the string in excl are in the dsn return rc=4 */
/* else returns rc=0 (excl strigs NOT in dsn) */

parse arg dsn , excl
upper dsn
upper excl

do i = 1 to words(excl)
if pos(word(excl,i),dsn) > 0 then return 4
end

return 0

/*----------------------------------------------------*/
compress: Procedure
parse arg dsname, dstype

if dstype <> 'PDS' then do
say 'Invalid dataset type'
signal compress_exit
end

"LMINIT DATAID(LMIID) DATASET('"dsname"') ENQ(EXCLU)"
if rc <> 0 then do
say "LMINIT RC="rc
say ZERRLM
signal compress_exit
end

"LMCOMP DATAID("lmiid")"
if rc=0 then do
say "Compressed"
end
else do
say "LMCOMP RC="rc
say ZERRLM
end

"LMFREE DATAID("lmiid")"

compress_exit:
return 0
And this is the panel definition:
)PANEL KEYLIST(ISRSPBC,ISR)
)ATTR
@ TYPE(OUTPUT) INTENS(LOW) COLOR(YELLOW)
)BODY EXPAND(//)
%--/-/-- Dataset List --/-/--
%Command ==> _ZCMD / / +Scroll ===>_ZAMT+

+DSLIST - Data Sets Matching@Z +

)MODEL
_Z+ @Z +
)INIT
.ZVARS = '(PFX SEL DSNAME)'
&zamt=csr
&zcmd=''
&sel=''
.HELP=ISR00003

)REINIT
IF (.MSG = ' ')
&SEL = ' '
REFRESH (SEL)

)PROC
IF (&ZTDSELS ^= 0000)
VER (&SEL, LIST, B, b, E , e , S , s, Z, z)

)END
Optional Instructions…!
One great thing about the development of the IBM mainframe hardware of the last few years has been the addition of lots of nice new, shiny instructions especially those that allow for the use of all or part of the ‘grande’, I.E. 64 bit, registers. For example, to do a locked update on a double word (8 bytes) in the past you would need to use two pairs of registers, for example, zero and one and fourteen and fifteen and use a Compare Double and Swap (CDS) instruction to do the update. Oh, and those pairs of registers had to be even-odd as well. Now you can just use two 64 bit registers and use a Compares and Swap Grande (CSG) instruction to do the update and the registers do not need to be an even-odd pair either.
Basically, code that used to take several instructions and registers can often be simplified into fewer instructions and use less registers by using the newer instructions from the instruction set. The benefit is less CPU time consumed and faster execution.
This is great and I’ve been doing this sort of thing for a good few years now. However, if you read the POP (Principles of Operation) you may notice next to some instructions under the ‘Program Exceptions’ heading something along the lines of:
- Operation (if …… facility is not installed)
What this means is that this instruction is ‘optional! What that means is that it may not be physically implemented on the machine and what that means is that if you try to execute it, you will get an operation exception (S0C1 abend).
There are fields in the PSA you can test to see if a facility is installed before attempting to use an instruction or feature of the hardware but to be honest, in all my forty some years of coding, I have never had to do that…..Until now.
Well, actually, not even now which I will explain in a minute.
I wrote some code recently and wanted to do a divide. Because of the size of the numbers, I used the grande version of the divide instruction. Before doing the divide I needed to clear the high word of the registers so I used the SHHHR Subtract High instruction.
This worked great on my test machine but failed on another machine with an S0C1 abend. Yep, that other machine did not have the high-word feature installed.
It was easy enough to replace the instruction with another (The ICMH version of Insert Character under Mask) which is not feature based and so should be there on all hardware but this is the first time in all my years of coding that I’ve ever had to even consider to availability of a feature.
I’ve always thought of the instruction set in the machine as being like an engine in a car, every car has an engine, but I’ve never really considered that not all car engines are the same. If you want more power, it typically costs more to buy a car with a more powerful engine. A more powerful car will (speed limits aside) get you from A to B more quickly and if time is money, spending money up front to get a more powerful car will save you time (and money) later on. In the computer world, you can pay more up front to buy a machine with more features (better instruction set) and get faster execution which save CPU time and thus chargeable MSUs or you can pay less and pay the money when you consume the extra MSUs due to the smaller and thus slower instruction set available to code running on the machine.
In my case, rather than test to see if the feature (instruction) was available before using it I just replaced it with an instruction that I know will always be there. This reason for this is that this is very low use code and it was two instances of one instruction. It would take longer to execute the code to test for the feature and branch to alternate code than it would to just always just execute an alternative instruction. That test and branch also adds slightly more complexity to the code which adds to the possibility of errors and makes it just that bit harder to maintain.
Had the block of code been high use and/or very complex it may have been worth while to test for the feature and use the faster instructions/simpler code when available but that was not the case here. Simple is good in my book!
A Matter of Style – Labels…
As much as possible I try to make it obvious from a variable label, what type of variable it is and wherever possible, what other variable or control block it is related to.
Constants
I start variable names for constants with a # sign, thus:
#NAME DC C'NAME'
If a variable starting with a # sign is on the receiving end of an instruction, it is wrong because I should not be modifying constants!
Equates
I start equated value names with an @ sign, thus:
@ONE   EQU   1
@FLAG1 EQU   X'80'
For equated symbols that define a length, I add the suffix ‘_LEN’ to the symbol name, thus:
FIELD1      DS    CL8
@FIELD1_LEN EQU   *-FIELD1
That way, it is obvious in the code that I am referring to an equated length value, for example:
LA R1,@FIELD1_LEN Get field length in R1
It it obvious that I intend to load the field length and not the field address into the register but having the _LEN suffix ensures that I get the length and do not accidentally code the field address instead.
Equate/Field relationship
I prefer to ‘tie’ equated values for a field to the field they relate to by using a naming convention that uses the field name as part of the equate symbol, thus:
FIELD1         DS  C
@FIELD1_YES    EQU C'Y'
@FIELD1_NO     EQU C'N'
@FIELD1_NOTSET EQU X'00'
Then in code I would write something like this:
          CLI   FIELD1,@FIELD1_YES
          BE   DO_YES
          CLI   FIELD1,@FIELD1_NO
          BE   DO_NO
          B     NOT_SET
Similar code would apply to setting the field value, only use equated symbols that are related to the target field. This convention ensures that you are only setting and testing for values actually defined for the field.
About the only exception to this rule that I use is the use of the following common equated symbols:
@YES    EQU   C'Y'
@NO     EQU   C'N'
@POSTED EQU   X'40'
@YES and @NO should be obvious, @POSTED is to test an ECB posted bit flag,E.G:
          TM    ECB1,@POSTED           Is ECB posted?
          BO    DONE
Field/DSECT relationship
When I am creating my own DSECTS I prefer to prefix the name of each field within the DSECT with the DSECT name and an underscore, thus:
SOMEBLOK DSECT
SOMEBLOK_FIELD1 DS CL8
SOMEBLOK_FIELD2 DS F
@SOMEBLOK_LEN   EQU *-SOMEBLOK
Using this standard makes it easy when reading source code to determine who owns a field. There is no confusion. The length equate for the control block also follows my convention of adding _LEN to the end and prefixing the equate symbol with an @ sign to avoid ambiguity in the executable code.
The exception to the rule…
I do allow for one exception to this rule though and that is for a program’s working storage. Typically I prefix working storage fields with the prefix STG_ (short for ‘storage’) although you can use anything you want, to identify working storage fields, for example W_ etc. It is preferable to use the underscore as part of the name to avoid situations where a field name ‘might’ happen to start with whatever prefix you are using. For example if you use just W as your working storage field prefix, is WORKF1 a field in your working storage or somewhere else? Using this convention, STG_WORKF1 or W_WORKF1 are obviously part of the code’s working storage. And again, the convention ensures that you are using the field you intend and not a WORK1 field defined somewhere else that might allow the program to assemble but my then fail at execution time because the storage it refers to is not addressable or it is addressable but it’s the wrong field and messes up some other code (good luck finding that one!).
Summary
Whatever conventions you use, the aim is to make it less likely to introduce errors when developing the code and to make it much easier to read, and locate field owners several months later when someone else has to try to follow, understand and debug or modify your code.
A Matter of Style…
There are probably as many ways to write a program as there are programmers in the world, more if you accept that a program is solution or part thereof, to a problem and could be written in more than one language, each of which causes the writer to adopt differing styles.
So basically, there’s more than one way to skin a cat!
Now I’m not saying that the style of assembler programming that I have developed over the years is the best but I think it satisfies many of the requirements that I will cover in what I hope will be a short series of articles. Let’s put it this way, unless someone tells me different, I’ll tend to try to influence any code that I work in towards my preferred style although there are reasons for NOT doing that, for example to maintain the existing style or coding standards since a mix can make things worse.
SO! Why is style important?
Sometimes it isn’t. You may need to write a quick, one off, one use program to solve a problem. As long as it does the job, does style really matter? Well, it depends. If the code is simple then probably not but what if the code is complex? Then making the code at least readable and logical makes sense since if you get it wrong the first time through, it will be a lot easier to diagnose the problem and correct the code.
But let’s consider the more common situation where you are developing a program or even multiple programs that form a piece of software and those programs are for use by paying customers. In other words you are creating commercial software. I am also including software written for in house use (in the business sense) because such development, use and support usually involves internal billing and thus still qualifies it as commercial software.
Basically, if someone else other than the developer or developing department uses it, you can consider it to be commercial software in my mind.
So let’s say that you are assigned the task of developing a z/OS super widget application which, because it uses lots of system services will be written in assembler, or at least a lot of it will be. Let’s looks at how programming style will affect it’s life cycle.
Development
The faster you can develop and test the code to the point where it does what the requirements require without failing or causing other problems, the faster the product will reach the market and thus generate revenue for the business.
Everyone probably has a standard program entry and exit macro and possibly similar ones for subroutine entry and exit but what about other stuff. Parsing of input for example? Do you do it with hard coded assembler or use a macro or service to do parsing in a standard and consistent manner? If a service, do you call that service using a macro to make coding the call simpler and standard? Or, do you let your programmers set everything up by hand (guess which is the more reliable method)?
Do you use a standard form of label name for program labels and subroutine names? Are you still stuck in the ‘all labels must be 8 characters long’ mental state or do you use longer and more meaningful names, either CamelCase or with parts separated by underscores, E.G. WORK_FIELD_1.
Do you use naming standards to tie equated symbols to the field they relate to or is it a free for all. Is it easy to tell, without looking at the variable definition, if a variable name is a label or an equated value and if a label, is it easy to tell which control block it belongs to, or if a constant, is it easy to tell that it is a constant?
And most importantly in my mind, do you create comment blocks for the program as a whole and for each subroutine that describes the program, it’s inputs, outputs and return codes and the same for all subroutines? Also, if the program is reliant upon a particular control block structure, do you document that WITHIN the code as best you can (using good old EBCDIC character graphics if need be) so that the architecture is right there in the code, not lost on some hard drive somewhere that got wiped because someone didn’t realize that what was on it was needed (the ‘not my job’ syndrome!).
Maintenance
If the code is well structured, follows consistent naming standards, uses macros to standardize the coding of interface, has proper comments describing what each routine does, what it’s input and outputs are then understanding the code and diagnosing a problem becomes a lot easier and more importantly faster. You are also more likely to be able to correctly fix any problem without introducing new problems. All the above result in a faster turn around time for the resolution of any code related problems. They also mean it is much easier for someone other than the original developer to pick up the code and work on it with confidence.
This all results in improved customer confidence in the product and better tolerance for any problems that do occur because they know that they can be quickly resolved.
New Features
Code that is well structured is much easier to modify to add new features to. And just like the maintenance situation, there is less likelihood of such changes introducing new problems into either the new or the existing code. This all helps to get the product out to market that much quicker and earning revenue.
The Bottom Line
If you are a commercial programmer, that is, it’s your job, your work earns the business that you work for, the money that pays your wages. The quicker you can develop new code or fix existing code directly affects the companies business results and therefore your earnings.
ISPF Edit ‘Count’ macro
Just a little macro I put together to count the number of occurrences of a string in a file when editing it.
/* rexx */
ADDRESS ISREDIT "MACRO (text)"

if text = '' then do
 say 'Nothing to search for. Enter text to search for ith cmd'
 return 0
 end

address isredit "find all "text
address isredit "(num,lines) = FIND_COUNTS"
num=num+0
lines=lines+0
s=''
if num > 1 then s='s'
ls=''
if lines > 1 then ls='s'
on=''
if lines > 0 then on = ' on 'lines' line'ls
say 'Found 'num' occurance's' of 'text||on
To run it, just type count followed by the string to search for, and any other parameters such as the column number on the command line when in edit and press enter. E.G.
COUNT ‘some string’
or
COUNT NAME 1
The humble EJECT statement…
Back in the day when dinosaurs still roamed the earth and programmers still knew how to use a card punch, there were printers. Not your desktop printer of today but huge big, noisy things with all the characters on a chain, a ‘ribbon’ as wide as the paper that fed vertically on rollers and a a row of hammers that stuck the correct character as it went past on the chain, if you got it setup right that is! These things also used a paper loop for carriage control that told it where various spots where on the page, in particular the top of the page. Happy days!
In those days your program listing got printed out, so to make it more readable you’d put EJECT statements into the source code, usually before a subroutine so that the subroutine and all the comments about what it did, its inputs and outputs etc; (you did document all that stuff didn’t you?) were at the top of a page.
Fast (or not) forward to today and I doubt anyone actually prints program listings anymore. If you are anything like me it’s all online, either in SDSF, sent to a member of a ‘listings’ dataset or, if your source is off platform, your tool set grabs the output after the assembly has run and FTPs it back to your workstation/PC where again, you can view it online.
So, since the output is now all just one big stream, why would you bother putting EJECT statements into your source, other than from habit?
Now I will admit that I did this from habit until I got to thinking about it (hence this post!) and there is actually a very good reason to include EJECT statements in your source, especially before the start of a subroutine.
Here’s a little test program:
TEST     CSECT
         BAKR  14,0
         LR    R10,R15
         USING TEST,R10
         USING WSA,R2
*
*
         XR    R15,R15
         PR
         LTORG
*
SUB1     DS    0H
         LA    R1,FIELD1
         XR    R15,R15
         BR    R14
*
         LTORG
*
WSA      DSECT
FIELD1   DS    F'0'
FIELD2   DS    F'0'
*
         END
If you assemble this, the output looks like this:
                                     20 TEST     RMODE ANY
000000                00000 00018    21 TEST     CSECT
000000 B240 00E0                     22          BAKR  14,0
000004 18AF                          23          LR    R10,R15
                 R:A  00000          24          USING TEST,R10
                 R:2  00000          25          USING WSA,R2
                                     26 *
                                     27 *
000006 17FF                          28          XR    R15,R15
000008 0101                          29          PR
000010                               30          LTORG
                                     31 *
000010                               32 SUB1     DS    0H
000010 4110 2000            00000    33          LA    R1,FIELD1
000014 17FF                          34          XR    R15,R15
000016 07FE                          35          BR    R14
                                     36 *
000018                               37          LTORG
                                     38 *
000000                00000 00008    39 WSA      DSECT
000000                               40 FIELD1   DS    F'0'
000004                               41 FIELD2   DS    F'0'
                                     42 *
                                     43          END
In this code, I have let the using for WSA in the main line code ‘fall through’ into the sub routine (something I normally hate to do except for working storage based on R13). The only way you can tell that the LA,R1,FIELD1 instruction in the subroutine is using R2 as a base register for WSA is by looking at the assembled instruction.
However, if you add an EJECT before the SUB1 label like this:
         EJECT
SUB1     DS    0H
         LA    R1,FIELD1
The output now looks like this:
000000                00000 00018    21 TEST     CSECT
000000 B240 00E0                     22          BAKR  14,0
000004 18AF                          23          LR    R10,R15
                 R:A  00000          24          USING TEST,R10
                 R:2  00000          25          USING WSA,R2
                                     26 *
                                     27 *
000006 17FF                          28          XR    R15,R15
000008 0101                          29          PR
000010                               30          LTORG
                                     31 *

  Active Usings: WSA(X'1000'),R2  TEST(X'1000'),R10
  Loc  Object Code    Addr1 Addr2  Stmt   Source Statement
000010                               33 SUB1     DS    0H
000010 4110 2000            00000    34          LA    R1,FIELD1
000014 17FF                          35          XR    R15,R15
000016 07FE                          36          BR    R14
                                     37 *
000018                               38          LTORG
                                     39 *
000000                00000 00008    40 WSA      DSECT
000000                               41 FIELD1   DS    F'0'
000004                               42 FIELD2   DS    F'0'
                                     43 *
                                     44          END
The difference is that you now get one or more lines (depends on how many usings are active) that show the current usings in effect at the very start of the subroutine. As a result I can see exactly which usings are active and whether I have inadvertently ‘inherited’ one from an earlier routine that should have been dropped.
As a matter of coding style, I prefer to always drop all active usings, including code base regs except for working storage that is based on R13, at the end of each routine. That way I
know I am using the correct registers and usings in each routine and by putting an EJECT statement in the source before each routine, I can easily see from the listing that I am not inadvertently inheriting a using from an earlier block of code that may allow the code to assemble but ultimately fail when it runs because I picked up the wrong base register.
